How to lay granite pavers?
Laying granite pavers takes place several steps: designing and preparing the paving area, excavation and foundation, and laying the pavers with jointing and cleaning.
Each step should adapt to the terrain’s configuration, the intended use (pedestrian or vehicular traffic), and the format of the chosen pavers.
Step 1: Designing and preparing the paving area
The first step to laying granite pavers is to properly prepare the site. This preparation phase is crucial to ensure a solid and long-lasting installation. Here are the various steps to follow:
Determine the Location:
Before starting the work, accurately determine the location where you want to lay the granite pavers. Consider the dimensions of the area to be paved and think about the desired layout of the pavers. Mark the boundaries of this area using stakes and ropes to clearly define the workspace.
Soil Preparation:
Ensure that the soil is ready to receive the granite pavers. It is important that the soil is well-levelled to prevent any future settling of the pavers. Remove any existing vegetation, roots, stones, and other obstacles that could hinder the proper placement of the pavers.
Marking:
Use stakes and ropes to precisely mark the boundaries of the paving area. Ensure that the ropes are taut and the corners are square.
This marking will serve as a guide during the laying process, helping to maintain symmetry and coherence in the final design.
Step 2: Ground foundations
Excavation:
The initial step in preparation involves excavating the area where you want to lay the granite pavers. Use a shovel or mechanical equipment to remove the existing soil to a depth of about 20 cm to 40 cm if the area is accessible by vehicles.
Installing the Base Layer:
Once the area is excavated, it is essential to create a solid and well-compacted base layer to ensure the stability of the pavers. Add a layer of crushed gravel or stabilised sand approximately 10 cm thick across the entire excavated area. Distribute the base material evenly with a rake to achieve a consistent thickness.
Compact the Base Layer:
Use a plate compactor to firmly compact the base layer. Pass the compactor over the entire surface in a back-and-forth pattern, ensuring that every part of the base layer is evenly compacted. Repeat this process multiple times until the surface is well-tamped and firm.
Check the Level:
Use a bubble level or laser level to check the level of the base layer. A flat and level surface is crucial for precise paver placement. Add or remove base material as needed to correct any irregularities and achieve a flat surface.
Once the base layer is prepared, you are ready to move on to laying the granite pavers. A well-prepared base layer ensures a solid foundation for the pavers, resulting in a durable and visually appealing installation.
Step 3: Laying the granite pavers
Laying the Sand or Mortar Bed:
Start by spreading a layer of sand or mortar (a mix of sand, cement, and a bit of water) about 4 to 5 cm thick and level it with a straight edge.
Installing the Borders:
If you are using granite borders to define the paved area, place them along the outer edges first. Ensure that they are properly aligned and securely fixed in the ground using stakes or pins. Borders will help keep the pavers in place and prevent any unwanted movement.
Laying the Pavers:
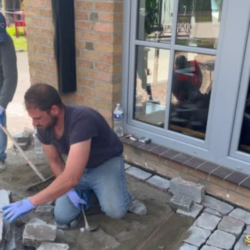
Begin laying the granite pavers in the corner of the area to be paved, directly on the base layer, maintaining a 1 to 3 cm gap between each paver. Ensure they are well-aligned and use a rubber mallet to gently tap the pavers into the sand, slightly embedding them. Continue laying the pavers in a regular pattern.
It is also possible to lay granite pavers directly on a pre-poured concrete slab. First, make sure the slab is defect-free, solid, and dry. Clean the surface if necessary, then apply a bonding primer to strengthen the cohesion between the concrete slab and the adhesive or mortar. Use adhesive if the pavers are calibrated, otherwise, apply a thick mortar. Regularly check the surface for levelness using a straight edge.
Check the Level and Alignment:
While laying the pavers, use a bubble level to regularly check the level and alignment of the surface. Ensure that the pavers are level and that the gaps between them are uniform. If needed, add or remove sand underneath the pavers to adjust their position.
Compact the Pavers:
Once all the pavers are laid, use a plate compactor to compact the surface. Pass the compactor over the entire paved area in a crisscross pattern to ensure that all pavers are embedded in the sand and the surface is even.
Jointing:
After compacting the surface, fill the gaps between the pavers with sand or thin mortar. Distribute the sand over the paved surface and use a brush to sweep it into the gaps. Then, water the surface to help the sand settle and fill the spaces between the pavers.
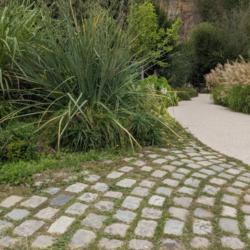
For a grass jointing option, fill the spaces between the pavers with soil or a planting substrate, allowing grass seeds or creeping plants to take root. Over time, these plants will grow and create a natural grass joint.
-

- Pose de pavés en granit
-
- Pavés avec jointement en herbe