


How to install edging stones ?
Garden edging is used to define, structure and embellish different outdoor spaces. They are versatile and can define lawn areas, flowerbeds, garden paths or terraces. Install garden edging borders and add a neat touch to your outdoor sapce while ensuring the stability of the various areas and preventing plants from protruding beyond the defined area. To install or lay a border, a few preparatory steps are essential to guarantee a result that is both aesthetically pleasing and long-lasting.
Planning and preparation, defining the edges
Before you start, it’s essential to plan where to lay and choose the type of border. Using a chalk line and stakes, mark out where you are going to install your edging. This will enable to determine the number of borders you will need, based on the distance you have set. Edging for a garden path is generally measured in linear metres. This means that the total length of edging required to mark out an area or path is expressed in metres. This measurement can be used to determine the amount of edging you’ll need to cover a certain distance, whether it’s for edging a flower bed or a pathway.
-

- Slate stone steps

-
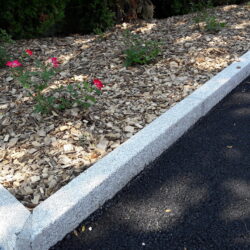
- Granite edging stones
-
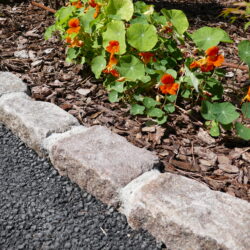
- Edging paver cobbles
Dig a trench to lay the border
To ensure the stability of stone garden borders (granite, slate, sandstone), it is essential not to lay them directly on the ground, as they could be moved. It is therefore preferable to semi-bury the stone borders.
To calculate the depth of the trench, it is advisable to count half the height of the border and add 3cm.
Once the trench has been dug, compact the base to create a flatter surface suitable for laying the edging. To make it easier to adjust and position the kerbs precisely, we recommend that you place a bed of sand in the trench.
Prepare a sealant to fix the border
Start by pouring the mortar (a mixture of cement, sand and water) into a bucket. Follow the manufacturer’s instructions for the correct proportion of cement and sand. Generally, a mixture of 1 part cement to 3 or 4 parts sand is used for edge sealant. Mix the dry ingredients thoroughly with a trowel or spatula.
Adding water: Add water to the mixture gradually. Be careful not to add all the water at once to avoid a mixture that is too liquid. Use a trowel or spatula to incorporate the water and mortar mixture until you obtain a smooth, malleable consistency.
Even mixing: Continue mixing until the mortar is evenly moistened. Make sure it is flexible enough to be applied easily, but not too liquid to prevent sagging. Test the consistency of the mortar by applying it to a small section of edge. Make sure it adheres well and can be worked easily.
Application: Once the mortar has been prepared, apply it between the gaps in the kerbs to seal and stabilise their position. Use a trowel or spatula to fill the gaps between the kerbs with the mortar. Be sure to smooth the surface to achieve a uniform appearance.
Leave the mortar to dry for 24 to 48 hours, then cover the space between the borders and the ground with soil. You can also sow the lawn.
