


Installation of paving on a mortar bed
Installing drive-over pavers on a mortar bed is a robust and durable method of creating a driveway, car park or other outdoor space that will withstand frequent vehicle traffic and the elements. In this article, we’ll guide you through the essential steps for installing pavers on a mortar bed and creating a ong-lasting, functional outdoor space.
Stage 1: Preparing the area
The first step is to prepare the ground for the cobblestones:
Mark out the area: Use string lines to mark out the area where the paving stones will be installed. Make sure the lines are straight.
Dig the area deep enough to accommodate the layer of mortar and the cobblestones to lay on top. For a driveway, the recommended depth is at least 20 cm.
Check the slope: Provide a slope of at least 1% to allow rainwater to drain away. You should also make sure to provide drainage if necessary.
Step 2: Laying the geotextile
To prevent weeds from growing and to prevent the different materials from mixing, we recommend laying a geotextile over the excavated soil.
Unroll the geotextile: Place the geotextile over the entire excavated surface, cutting it if necessary to fit the area perfectly.
Secure the geotextile: Secure the geotextile in place using pegs or stakes to keep it taut.
Step 3: Creating the underlay
The underlay is essential to stabilise the mortar bed and ensure a solid base for the paving stones.
Lay the gravel or sand base: Spread a layer of gravel or sand over the geotextile. Make sure the layer is level.
Make sure it is level: Use a rake or board to level the layer of gravel and make sure the ground is level.
Step 4: Preparing the mortar bed
The mortar bed is the layer on which the pavers will be laid. Here’s how to prepare this layer:
Mix the mortar: Prepare a lean mortar by mixing 0/4 sand with a little cement and water. The mixture should be liquid enough to work with.
Apply the mortar: Spread the mortar over the layer of gravel or sand using a trowel. Make sure the layer is of uniform thickness.
-

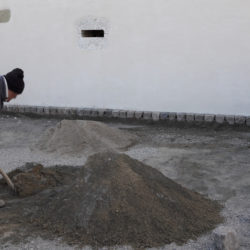
- Préparation du mortier pour pose de pavés anciens de Fontainebleau
-
- Pose de pavés anciens en ligne à joints croisés sur mortier maigre par un tâcheron local

-
- Laying paving stones on mortar

Step 5: Laying the cobblestones
Now that the mortar bed is ready, you can start laying the pavers:
Lay and install the pavers: Place the cobblestones directly on the mortar bed in the pattern you have chosen. You can opt for arch, circle, peacock-tail, cross-joint or line patterns. The cobblestones should be spaced approximately 2 to 3 cm apart, depending on their size and the type of joint used. For paving stones with a grass joint, we recommend a space of 5 cm between each paving stone.
Check evenness: Use a level to make sure the surface is flat during laying.
Step 6: Grouting and joints
Grouting is one of the final steps in completing the installation of driveway paving: Find out more about the type of grout and joints for paving.
Use a thin mortar: Prepare a thin mortar by mixing very fine 0/2 sand with cement and water. This mortar should be more liquid than the mortar bed.
Fill the joints between the cobblestones: Spread the mortar over the cobbles and scrape the surface fill the joints between the cobblestones. Make sure the joints are well filled.
Clean the cobbles: Clean the pavers with a hose or jet washer to remove any cement laitance.
Stage 7: Setting and drying
Leave the paving to set for a few days before allowing vehicles to drive or park on the area. This will allow the mortar to harden and ensure a solid, long-lasting installation.
By following these steps, you’ll be able to create an elegant and functional outdoor space by installing drive-over pavers on a bed of mortar. This method offers exceptional durability and weather resistance, making it an excellent choice for landscaping projects.
